Homemade Strawberry Jam
There’s something about homemade strawberry jam that just feels like summer - even if it’s the middle of winter and you’re standing in cozy socks in your kitchen. It’s nostalgic, comforting, and surprisingly simple. And once you make it once, I promise you’ll never look at store-bought jam the same way again.
This strawberry jam recipe is one of those “why didn’t I start doing this sooner?” kind of things. It’s sweet but not overly sugary, bright with fresh strawberry flavor, and comes together in one pot with just a handful of ingredients. No fancy equipment. No complicated steps. No stress.
If you’ve ever thought making jam was intimidating or required hours of canning knowledge - let me stop you right there. This is easy, approachable, and beginner-friendly. You don’t need to be a pro, and you don’t need to do everything perfectly. This is jam made for real life.
So grab a basket of strawberries, pour yourself a coffee and let’s make something delicious together.
Why You’ll Love This Strawberry Jam
First of all, the flavor. Fresh strawberries cooked down gently with sugar and lemon turn into the most vibrant, spoon-licking goodness. It’s not overly stiff, not watery - just that perfect jammy texture you want slathered on toast, swirled into yogurt, or spooned onto warm biscuits.
Second, you control everything. The sweetness, the texture, the ingredients. No preservatives, no mystery additives, no artificial flavors. Just strawberries doing their thing.
And finally - it makes your kitchen smell incredible. Truly. If smell could be bottled, this would be it.
Homemade Strawberry Jam Recipe
Ingredients
How to Make Strawberry Jam
Prep the strawberries
Wash, hull, and roughly chop the strawberries if you want a smoother jam. For chunkier jam, leave them mostly whole.Macerate
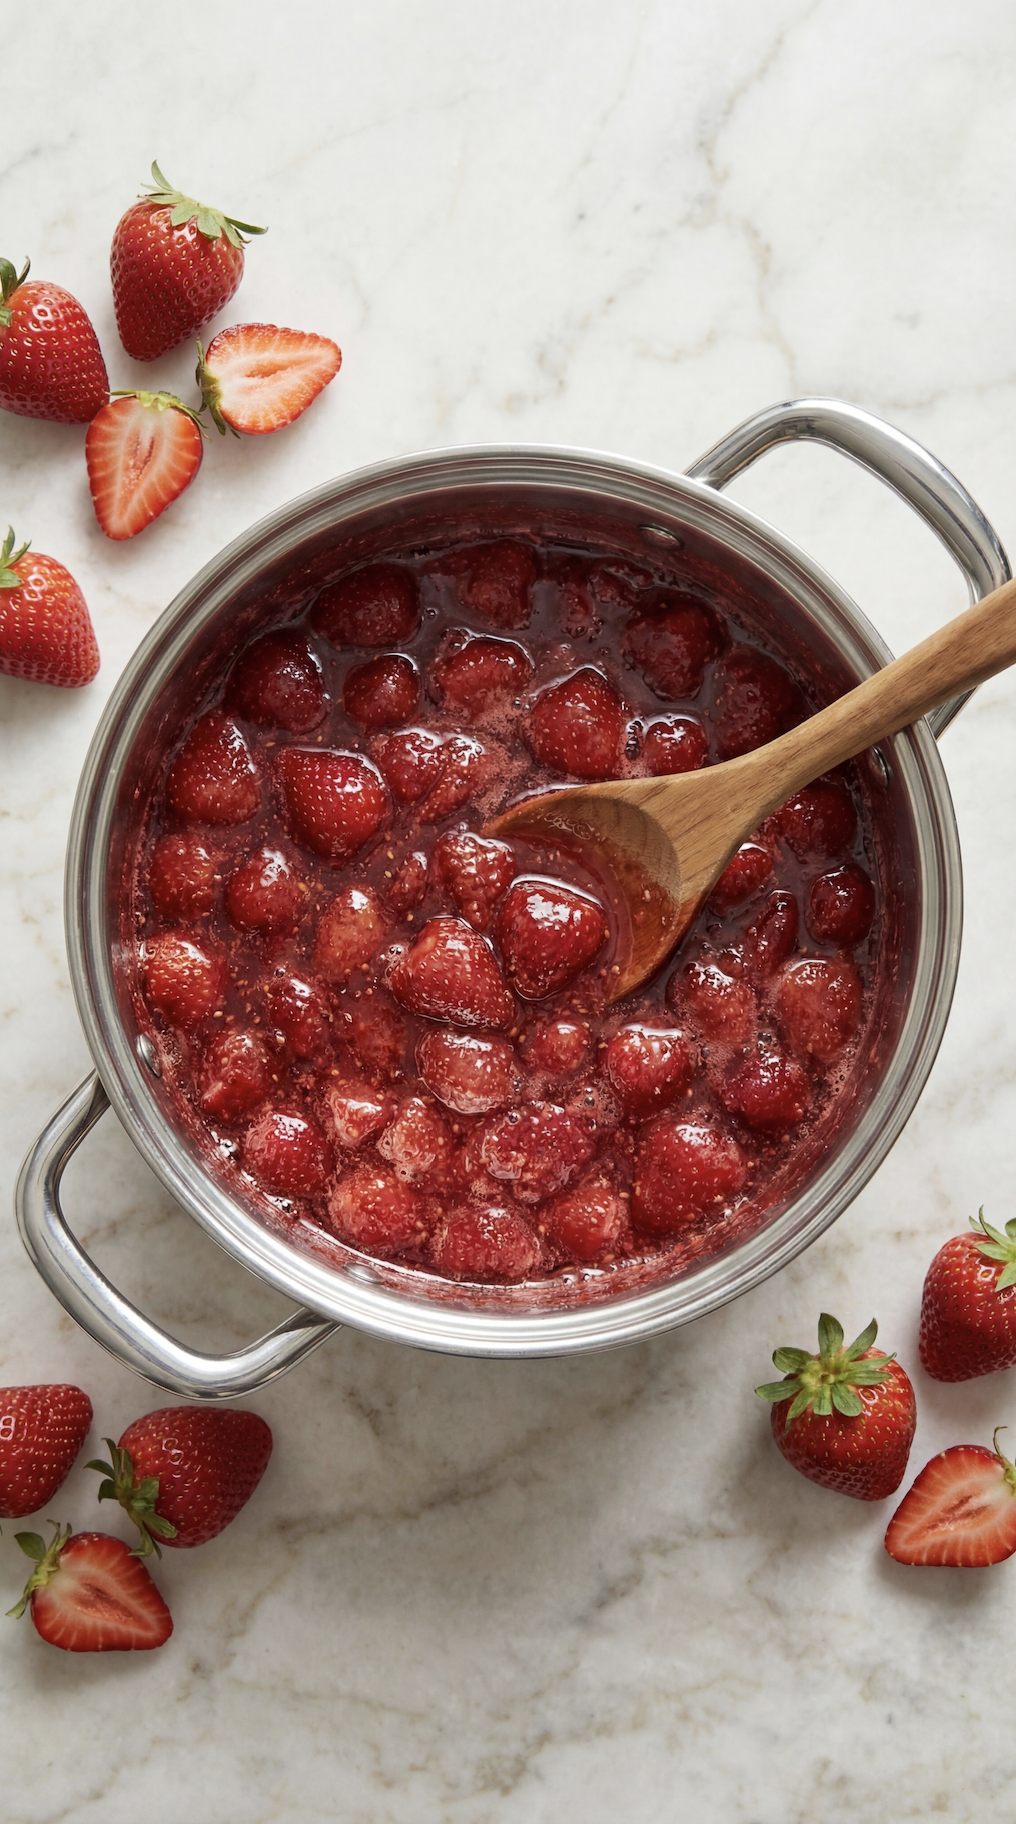
Place strawberries in a large pot. Add sugar, lemon juice, and salt. Stir gently and let sit for 20–30 minutes until juicy.Cook the jam
Place the pot over medium heat. Bring to a gentle boil, stirring occasionally to prevent sticking.Simmer and thicken
Reduce heat slightly and let simmer for 20–30 minutes. Stir occasionally and skim off any foam.Check doneness
The jam should look thick and glossy. Test with the spoon or plate method.Cool and store
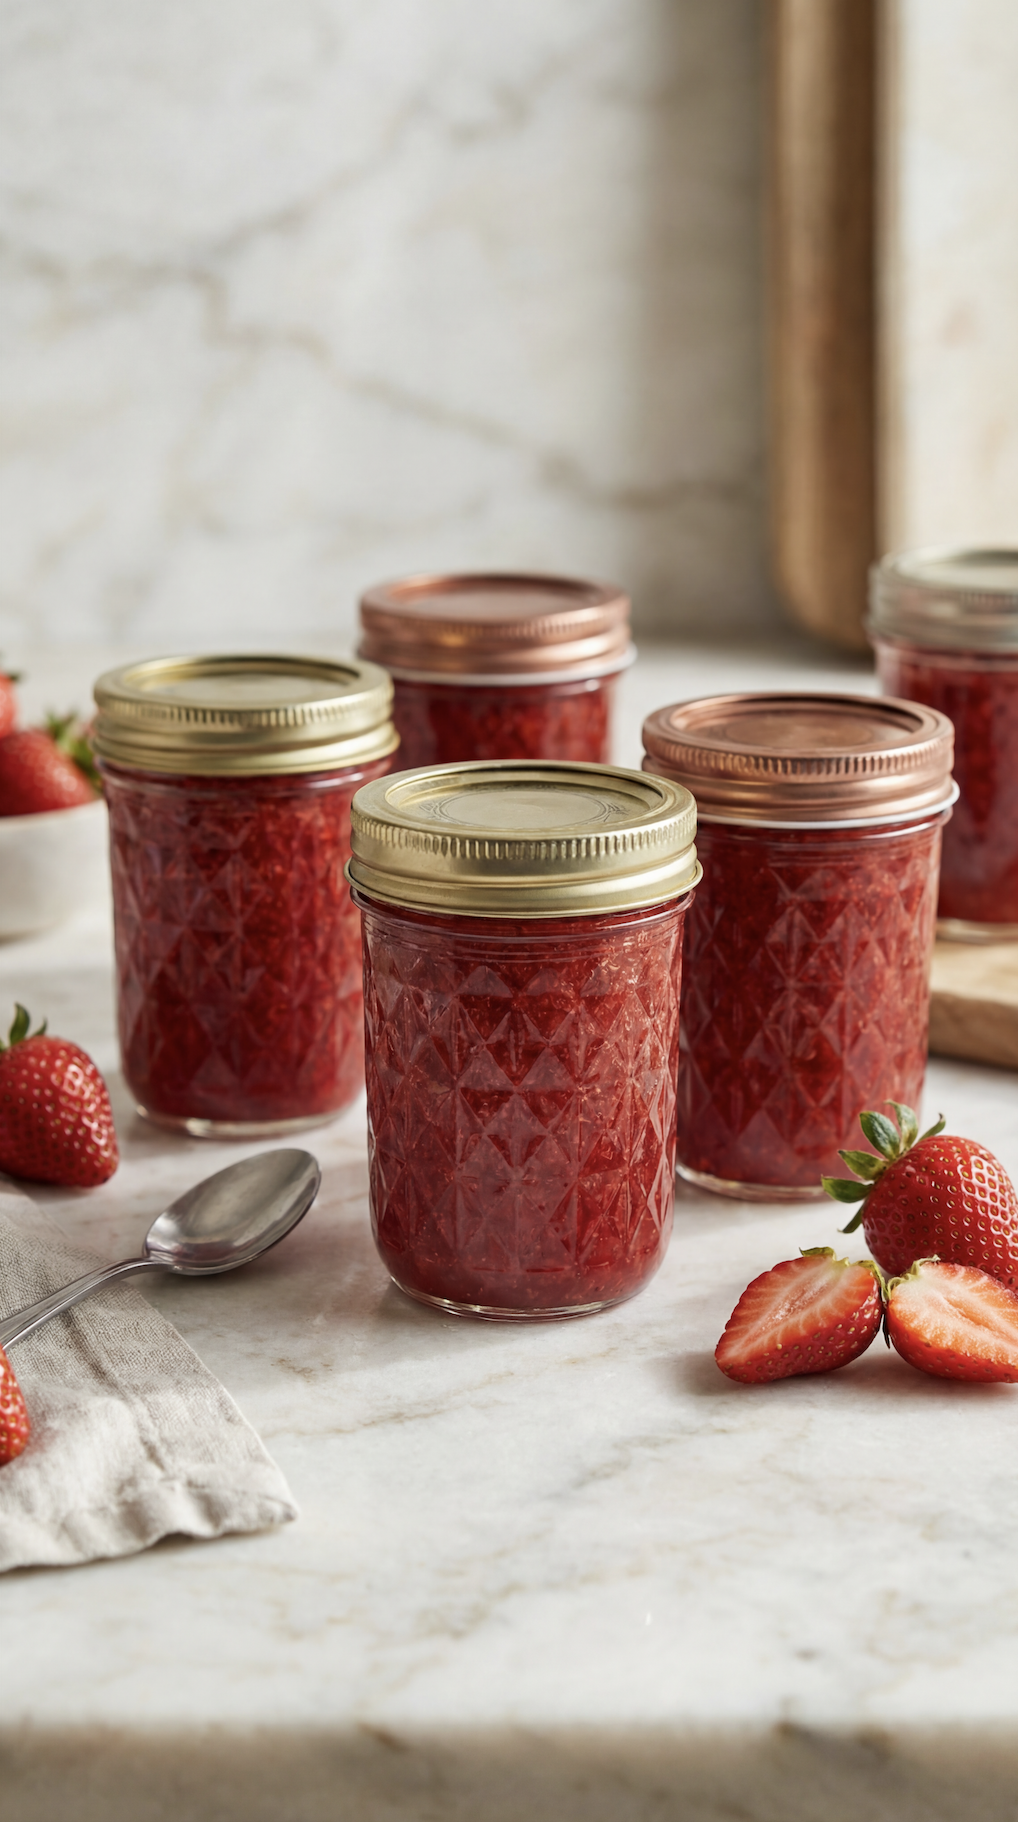
Remove from heat and let cool slightly. Transfer to clean jars. Store in the fridge once fully cooled.
A Little Jam Pep Talk (Because You Don’t Need to Be Perfect)
Before we get into it, I just want to say this: homemade jam doesn’t need to be flawless to be amazing.
Your strawberries don’t have to be perfectly uniform. Your jam doesn’t have to look like it came off a grocery store shelf. If it’s a little looser or a little chunkier than expected? That’s homemade charm.
Jam is forgiving. It thickens as it cools, it can be adjusted, and it always tastes better the next day. So take a deep breath and trust the process.
Let’s Talk Strawberries
Fresh, ripe strawberries are key here. They don’t need to be perfect - slightly soft is actually great because they release more juice. If your strawberries are super sweet, you can slightly reduce the sugar. If they’re a bit tart, the sugar balances everything out.
Wash them well, hull them, and decide how chunky you want your jam. You can leave them mostly whole for a rustic texture or chop them smaller if you prefer a smoother spread.
How This Jam Comes Together
This recipe starts by macerating the strawberries - which is just a fancy word for letting them sit with sugar so they release their juices. This step helps build flavor and jump-starts the jam process.
Once everything goes into the pot, it simmers gently until thick, glossy, and spoon-coating. You’ll stir occasionally, skim foam if needed, and watch the magic happen.
The whole process takes about 30–35 minutes, and most of that time is hands-off.
How to Know When Jam Is Ready
There are a few easy ways to tell:
It thickens noticeably and coats the back of a spoon
It bubbles slower and heavier
A spoon dragged through the pot leaves a line that takes a moment to fill back in
You can also do the classic plate test: place a small spoonful of jam on a cold plate, wait a few seconds, and push it with your finger. If it wrinkles slightly, you’re good to go.
Storage Tips
Once cooled, this jam can be stored:
In the fridge for up to 3 weeks
In the freezer for up to 6 months
Or water-bath canned for long-term storage if you prefer
For everyday use, fridge storage is perfect and easiest.
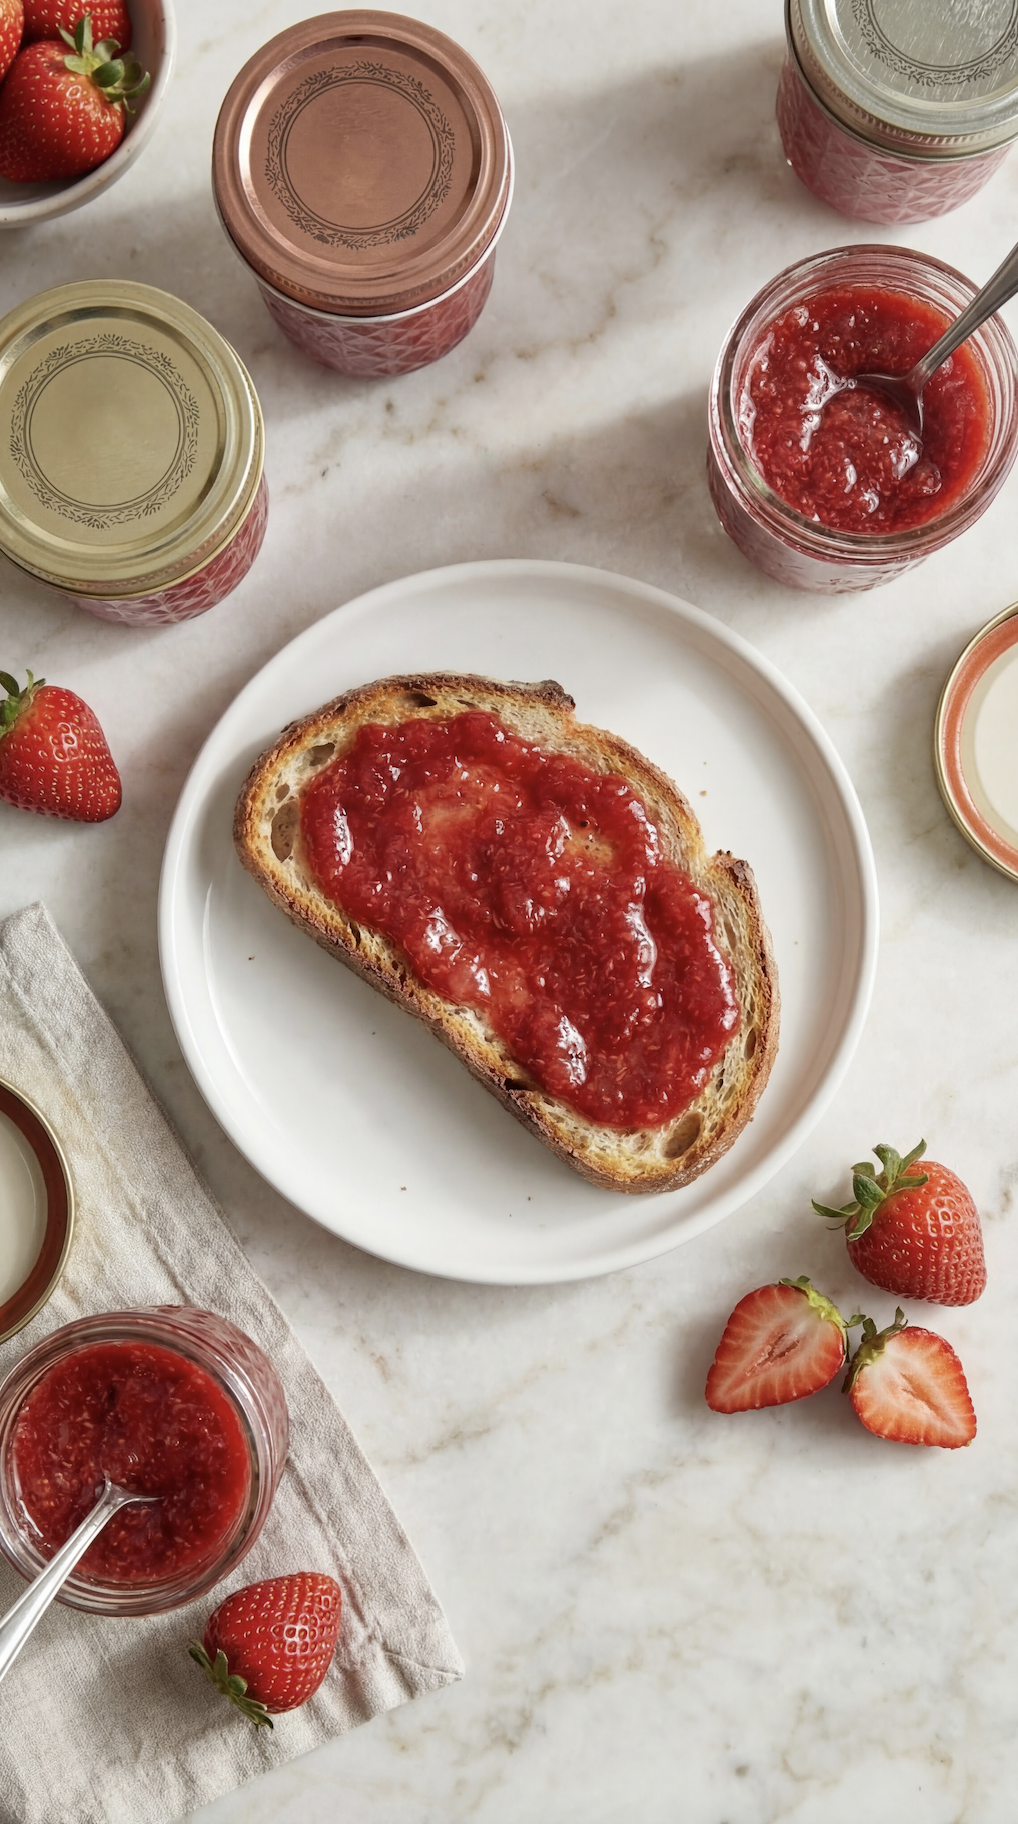
How to Use Strawberry Jam (Besides Toast)
Of course, toast is a classic. But don’t stop there:
Spoon over pancakes or waffles
Spread inside cakes or cupcakes
Serve with cheese boards
Layer into parfaits
Fill thumbprint cookies
Use as a glaze for pastries
Honestly, you’ll find excuses to use it once it’s in your fridge.
Final Thoughts
This strawberry jam is one of those recipes that feels like a little gift to yourself. It’s simple, comforting, and endlessly useful and once you taste it, you’ll understand why homemade really is better.
If you make this, I’d love for you to think of it as your go-to jam. The one you keep in the fridge. The one you reach for without thinking. The one that turns an ordinary piece of toast into something special.

Homemade Strawberry Jam
This strawberry jam recipe is one of those “why didn’t I start doing this sooner?” kind of things. It’s sweet but not overly sugary, bright with fresh strawberry flavor, and comes together in one pot with just a handful of ingredients. No fancy equipment. No complicated steps. No stress.
Ingredients
- 2 pounds fresh strawberries, hulled
- 1 ½ cups granulated sugar
- 2 tablespoons fresh lemon juice
- Pinch of salt
Instructions
Notes
Before we get into it, I just want to say this: homemade jam doesn’t need to be flawless to be amazing.
Your strawberries don’t have to be perfectly uniform. Your jam doesn’t have to look like it came off a grocery store shelf. If it’s a little looser or a little chunkier than expected? That’s homemade charm.
Jam is forgiving. It thickens as it cools, it can be adjusted, and it always tastes better the next day. So take a deep breath and trust the process.
Nutrition Facts
Carbs
124 gCholesterol
0 mgFiber
6 gFat
1 gNet carbs
117 gSat. Fat
0 gSodium
17 mgSugar
115 gProtein
2 gCalories
484Nutritional information is only an estimate. The accuracy of the nutritional information for any recipe on this site is not guaranteed.