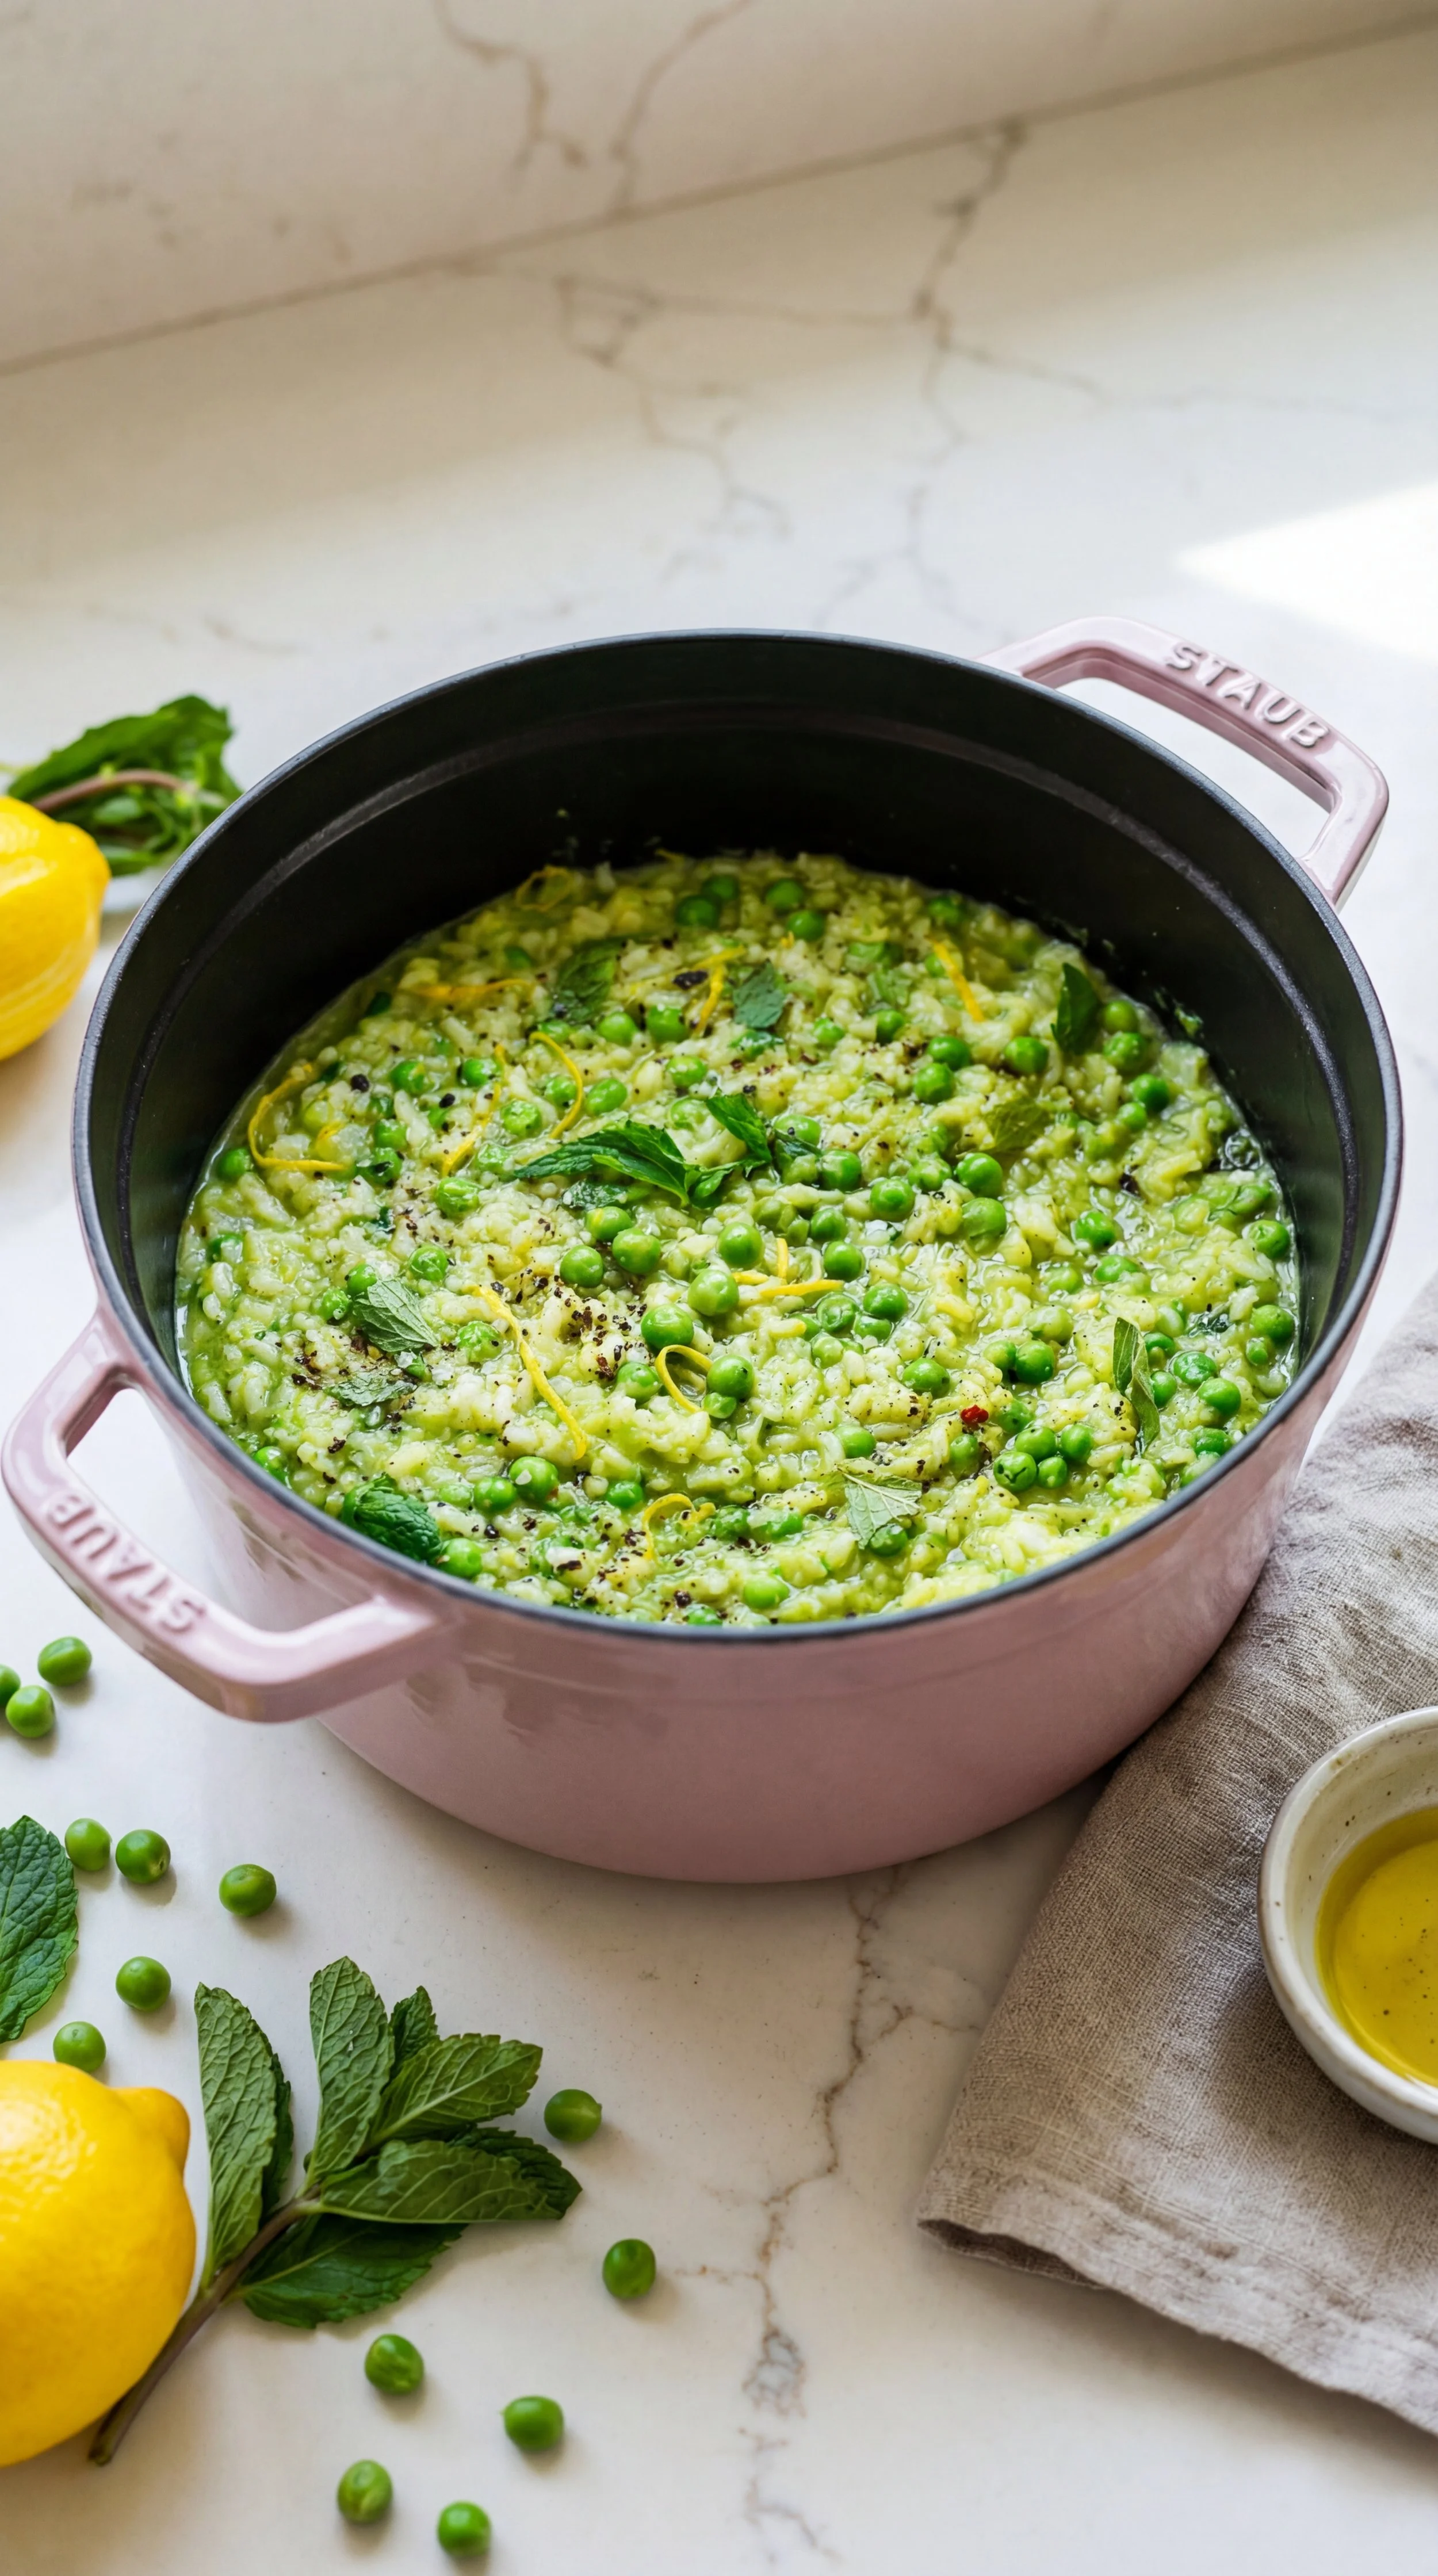
Creamy Green Pea Risotto with Mint & Lemon Zest
You know those meals that somehow feel like a hug in a bowl and something you’d order at a really good restaurant?
This green pea risotto is exactly that.
It’s creamy without being heavy, fresh without being boring, and cozy in that slow-simmered, stir-the-pot kind of way. The sweetness of the peas, the brightness from fresh lemon zest, and the pop of mint at the end make it feel special but not complicated or fussy.
This is the kind of recipe I make when I want to slow down, pour a glass of wine, and cook something that feels intentional… without wrecking the kitchen or needing a grocery list a mile long.
If risotto has ever felt intimidating to you, let me reassure you right now: you’ve got this. It’s not hard - it just asks for a little attention, and honestly, that’s part of the charm.
Let’s make it together.
Why You’ll Love This Risotto
First, let’s talk about why this recipe deserves a spot in your rotation:
It’s creamy and comforting, but still light and fresh
Uses simple, real ingredients
Feels elegant enough for guests, but easy enough for a weeknight
Naturally vegetarian (and easy to customize)
Made in one pot because of course it is
The lemon zest and mint take this risotto out of “winter-only comfort food” territory and make it perfect for spring and summer too. It’s bright, green, and full of life.
A Quick Risotto Pep Talk (Because People Get Nervous)
If you’ve heard risotto horror stories, here’s the truth:
Risotto isn’t difficult - it’s just hands-on.
You don’t need chef skills. You don’t need perfect timing. You just need to stir occasionally and add warm broth when the rice asks for it. That’s it.
Think of risotto like a conversation instead of a recipe you have to rush through.
And yes - it’s absolutely worth the effort.
Ingredients You’ll Need
Here’s what we’re working with today:
dry white wine
lemon zest
Salt and black pepper
Fresh mint leaves
Step-by-Step: How to Make Green Pea Risotto
Step 1: Warm Your Broth
Start by heating your vegetable broth in a saucepan. You want it warm - not boiling - so it doesn’t shock the rice when you add it.
This small step makes a big difference.
Step 2: Sauté the Base
In a large pot or Dutch oven, heat olive oil and butter over medium heat.
Add finely chopped onion or shallot and cook until soft and translucent. You’re not looking for color here just sweetness.
Add garlic and cook for about 30 seconds, just until fragrant.
Step 3: Toast the Rice
Add the arborio rice and stir to coat every grain in the fat.
Let it toast for about a minute. This helps the rice keep its shape while still turning creamy later.
Step 4: Deglaze (Optional but Recommended)
If using white wine, pour it in now and let it simmer until mostly absorbed. This adds a subtle acidity that balances the richness beautifully.
Step 5: Start the Risotto Rhythm
Add a ladle of warm broth and stir gently. When it’s mostly absorbed, add another ladle.
Repeat this process, stirring occasionally, letting the rice absorb the liquid slowly.
This takes about 18–22 minutes total.
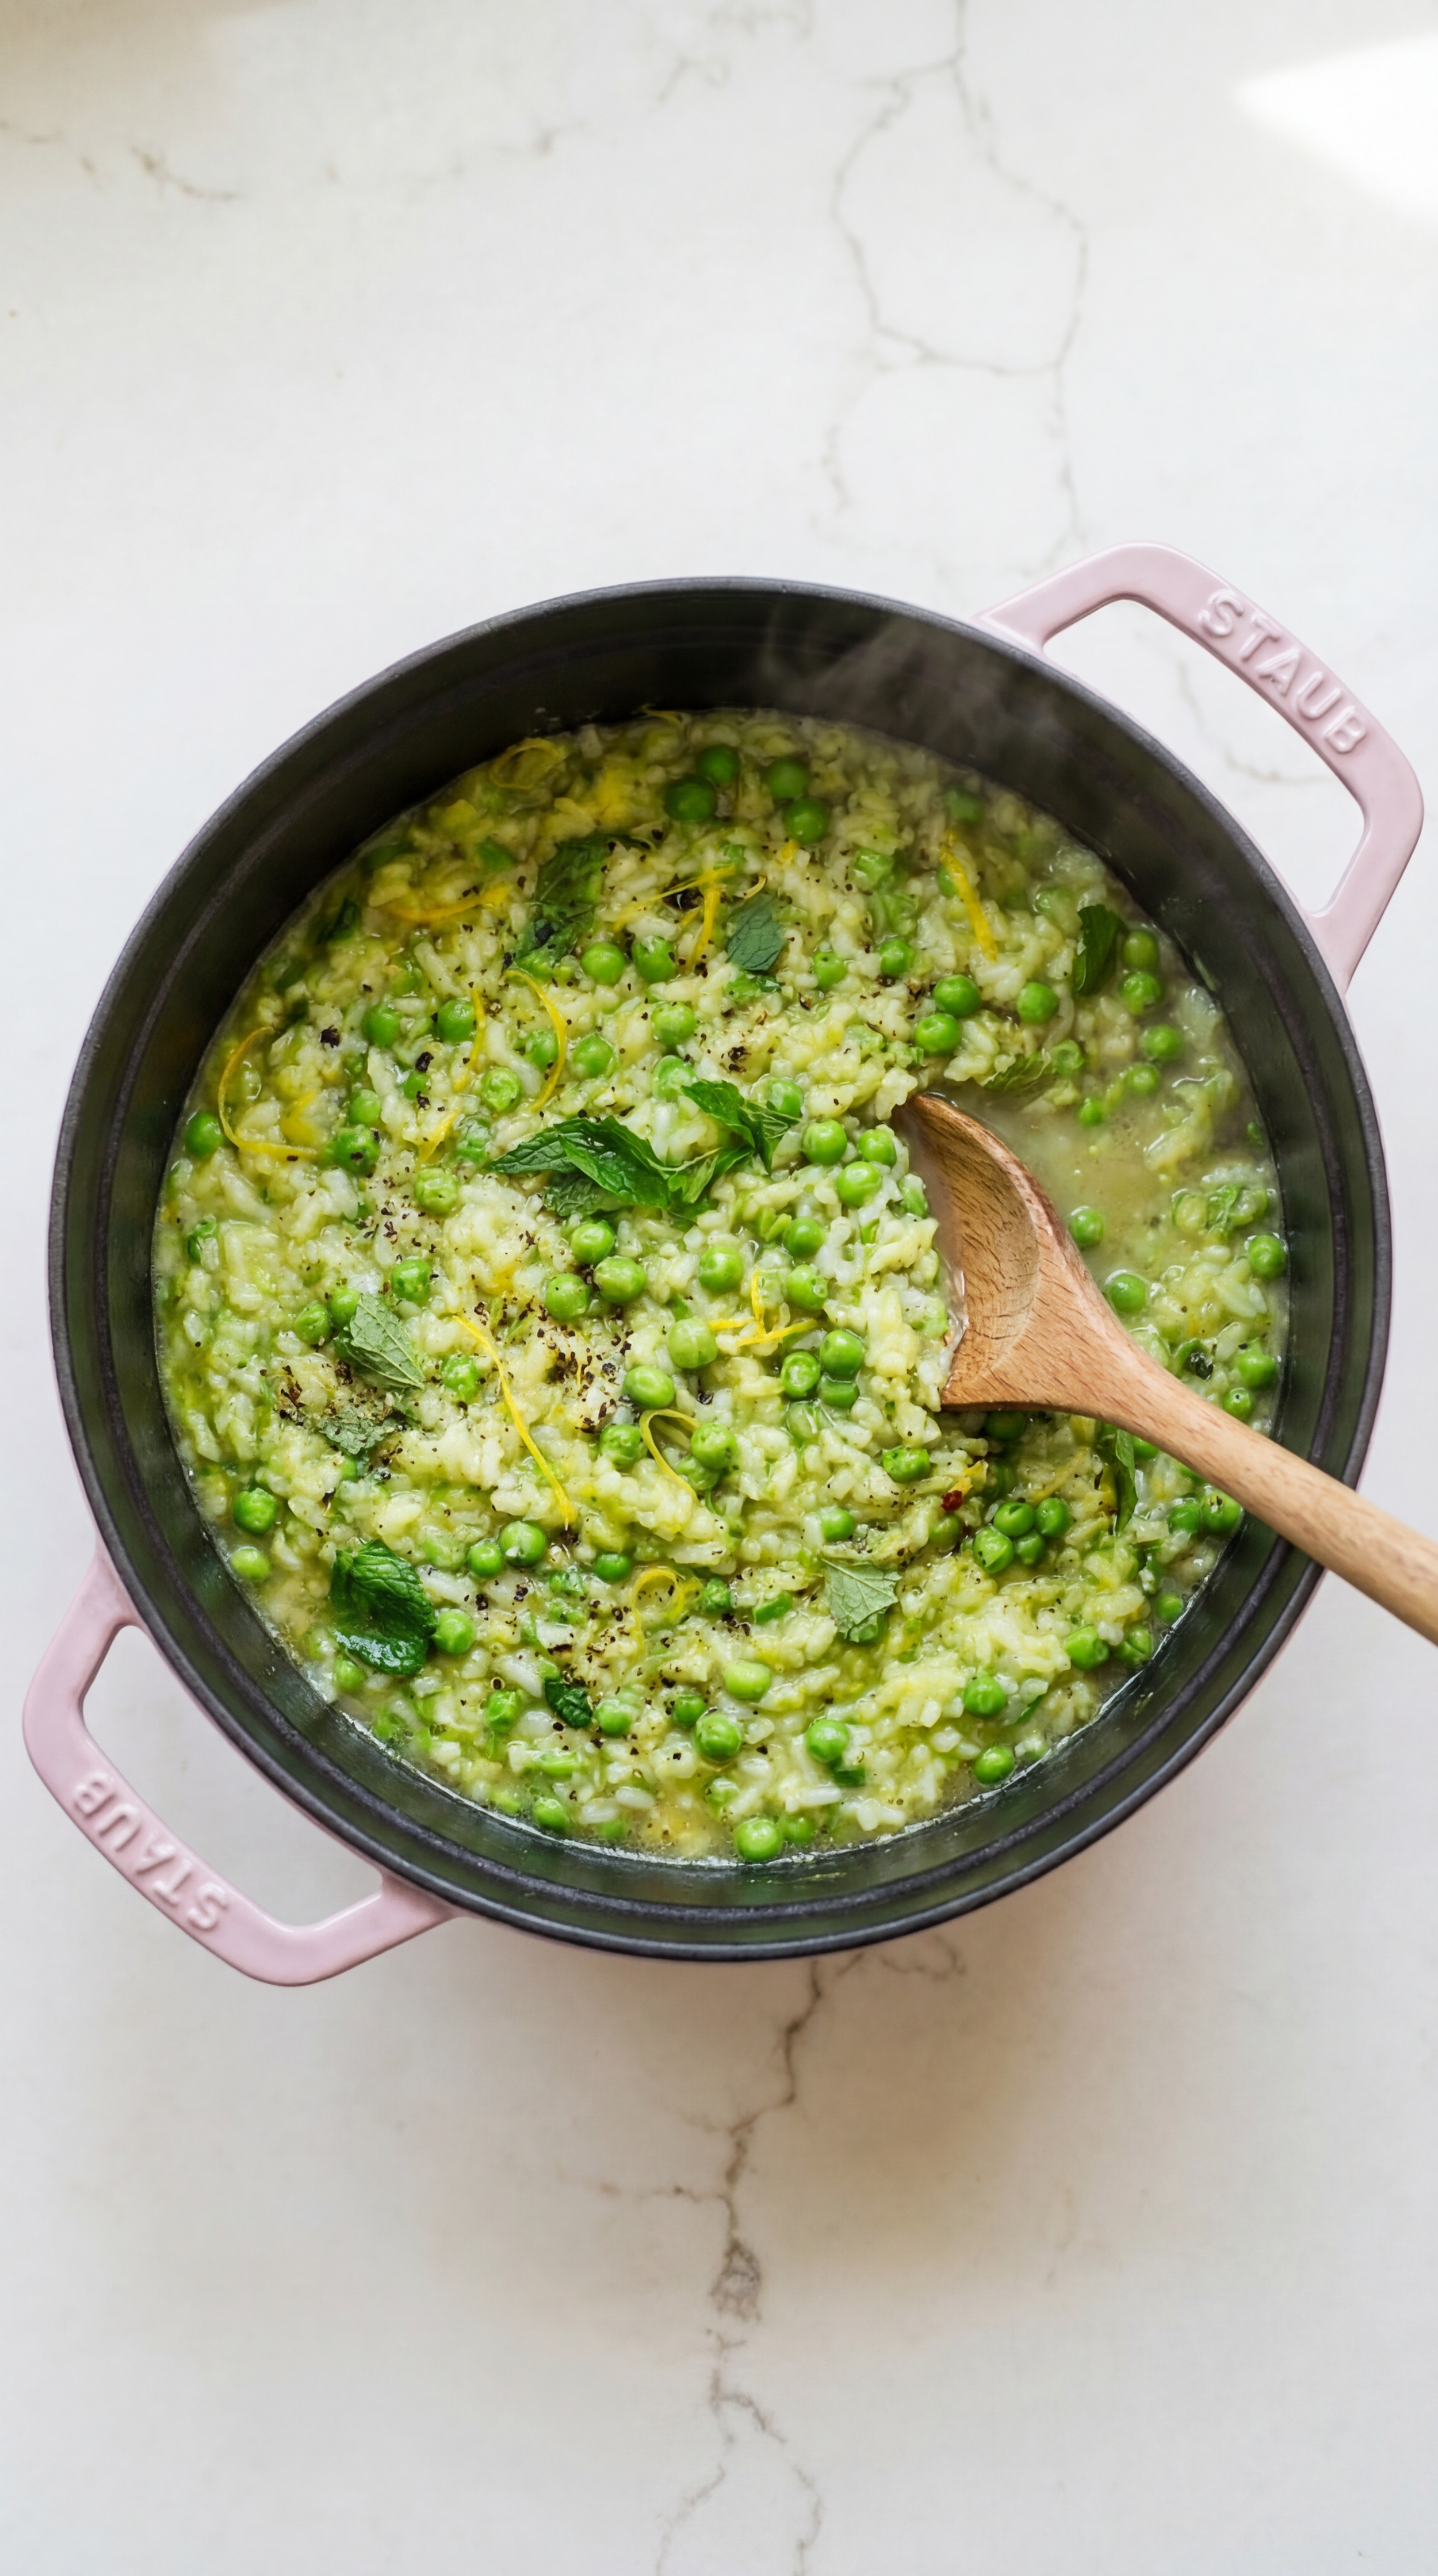
Step 6: Add the Peas
When the rice is almost tender, stir in the peas. Frozen peas work perfectly here - no need to thaw.
They’ll cook quickly and turn bright green.
Step 7: Finish with Flavor
Once the rice is tender but still has a slight bite, remove the pot from heat.
Stir in:
Butter
Freshly grated Parmesan
Lemon zest
Salt and black pepper
Taste and adjust seasoning.
The risotto should be creamy and slightly loose - it should slowly spread on the plate, not hold its shape like a mound.
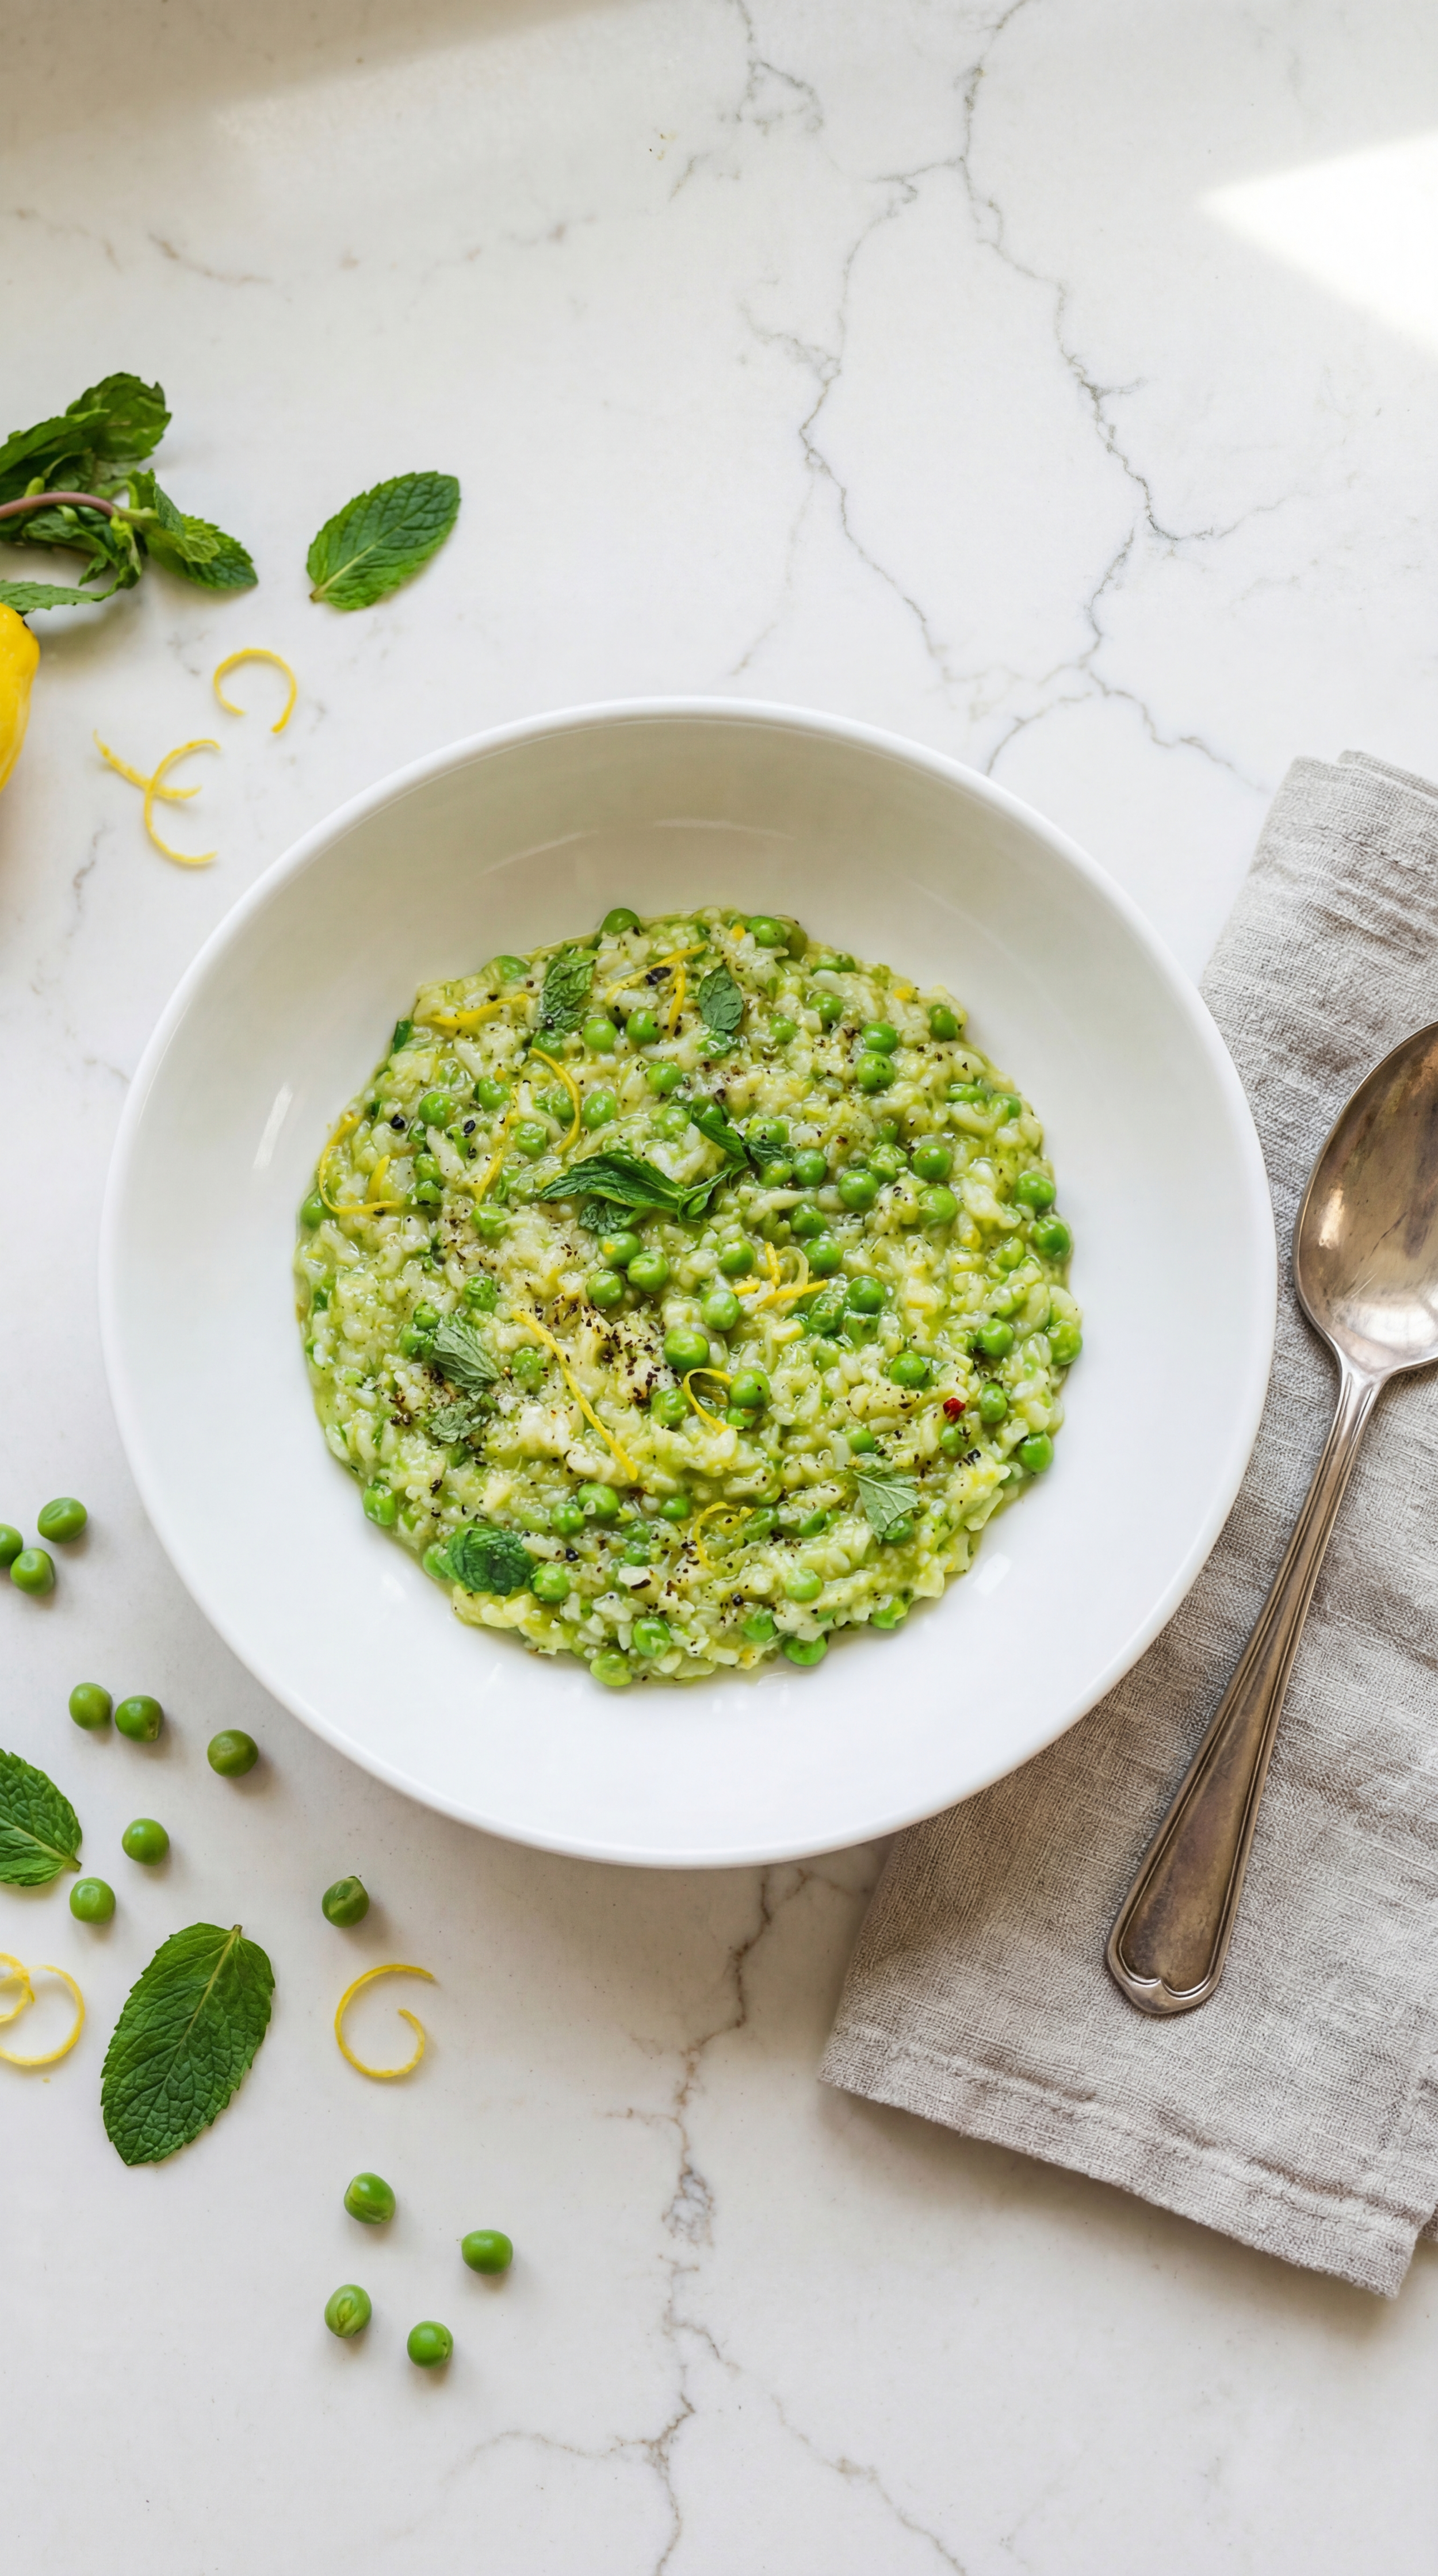
Step 8: Garnish & Serve
Finish with:
Fresh mint leaves
Extra lemon zest
A drizzle of olive oil
Cracked black pepper
Serve immediately while it’s at its creamiest.
The Secret to Creamy Risotto (Without Cream)
The creaminess in risotto doesn’t come from cream - it comes from the starch in the rice.
Arborio rice releases starch as it cooks slowly in broth, creating that silky texture everyone loves. That’s why:
You don’t rinse the rice
You add broth gradually
You stir gently and often
Trust the process. The rice does the work for you.
Tips for Perfect Risotto Every Time
Keep your broth warm
Don’t rush - medium heat is your friend
Stir gently, not constantly
Taste as you go
Stop cooking just before it feels done - it keeps cooking off heat
How to Store & Reheat
Risotto is best fresh, but leftovers still work.
To store:
Let cool, then refrigerate in an airtight container for up to 3 days.
To reheat:
Add a splash of broth or water and warm gently on the stove, stirring until creamy again.
Variations You’ll Love
Add crispy pancetta or prosciutto
Stir in mascarpone for extra richness
Final Thoughts
This green pea risotto is one of those recipes that reminds you cooking doesn’t have to be complicated to feel special.
It’s calm. It’s comforting. It’s fresh and cozy at the same time.
The kind of meal you make when you want to take care of yourself or someone you love.
Looking for more dinner recipes? Try my popular recipes below:

Creamy Green Pea Risotto with Mint & Lemon Zest
This green pea risotto is creamy without being heavy, fresh without being boring, and cozy in that slow-simmered, stir-the-pot kind of way. The sweetness of the peas, the brightness from fresh lemon zest, and the pop of mint at the end make it feel special but not complicated or fussy.
Ingredients
- 1 ½ cups arborio rice
- 1 small onion or shallot, finely chopped
- 2 cloves garlic, minced
- 4–5 cups vegetable broth, warmed
- 2 tbsp olive oil
- 2 tbsp butter, plus more to finish
- ½ cup dry white wine (optional)
- 1 ½ cups green peas (fresh or frozen)
- ¾ cup freshly grated Parmesan cheese
- Zest of 1 lemon
- Salt and black pepper, to taste
- Fresh mint leaves, for garnish
Instructions
Notes
Keep your broth warm
Don’t rush - medium heat is your friend
Stir gently, not constantly
Taste as you go
Stop cooking just before it feels done - it keeps cooking off heat
Nutrition Facts
Carbs
75 gCholesterol
32 mgFiber
6 gFat
19 gNet carbs
70 gSat. Fat
8 gSodium
1369 mgSugar
6 gProtein
14 gCalories
548Nutritional information is only an estimate. The accuracy of the nutritional information for any recipe on this site is not guaranteed.