Classic Chili
You know those recipes you don’t really need to think about anymore? The ones you could make half-asleep, on a cold night, with whatever you already have in the pantry - and they still turn out incredible?
This is that chili.
This is the chili I make when I want something comforting, filling, and deeply familiar. The kind that simmers away on the stove, makes the whole house smell amazing, and somehow tastes even better the next day. It’s not fancy. It’s not trying to reinvent chili. It’s just really, really good traditional chili.
And honestly? That’s exactly what most of us want.
Why This Chili Works Every Time
There are a million chili recipes out there. Some are spicy, some are sweet, some add unexpected ingredients (which can be fun!). But this one sticks close to the classic for a reason.
This chili is:
Rich and hearty
Thick but still spoonable
Perfectly seasoned without being overpowering
Balanced - savory, slightly smoky, a little tangy
It’s the kind of chili you can serve to literally anyone and know they’ll love it.
Ingredients
Chili:
Spices:
paprika (smoked if you have it)
The Base:
Beans:
The Instructions
Step 1: Start with the Aromatics
Heat the olive oil in a large pot over medium heat. Add the diced onion and bell pepper and cook for about 5 minutes, until softened. Stir in the garlic and cook for another 30 seconds, just until fragrant.
Already smells good, right?
Step 2: Brown the Beef
Add the ground beef to the pot. Break it up with a spoon and cook until fully browned. Season lightly with salt and pepper.
Once cooked, drain off excess grease if needed.
Step 3: Build the Flavor
Sprinkle in the chili powder, cumin, paprika, oregano, and cayenne. Stir well and let the spices cook for about a minute - this step really wakes them up and adds depth.
Step 4: Add tomatoes and Broth
Pour in the crushed tomatoes, diced tomatoes, and beef broth. Stir everything together until well combined.
At this point, it already looks like chili.
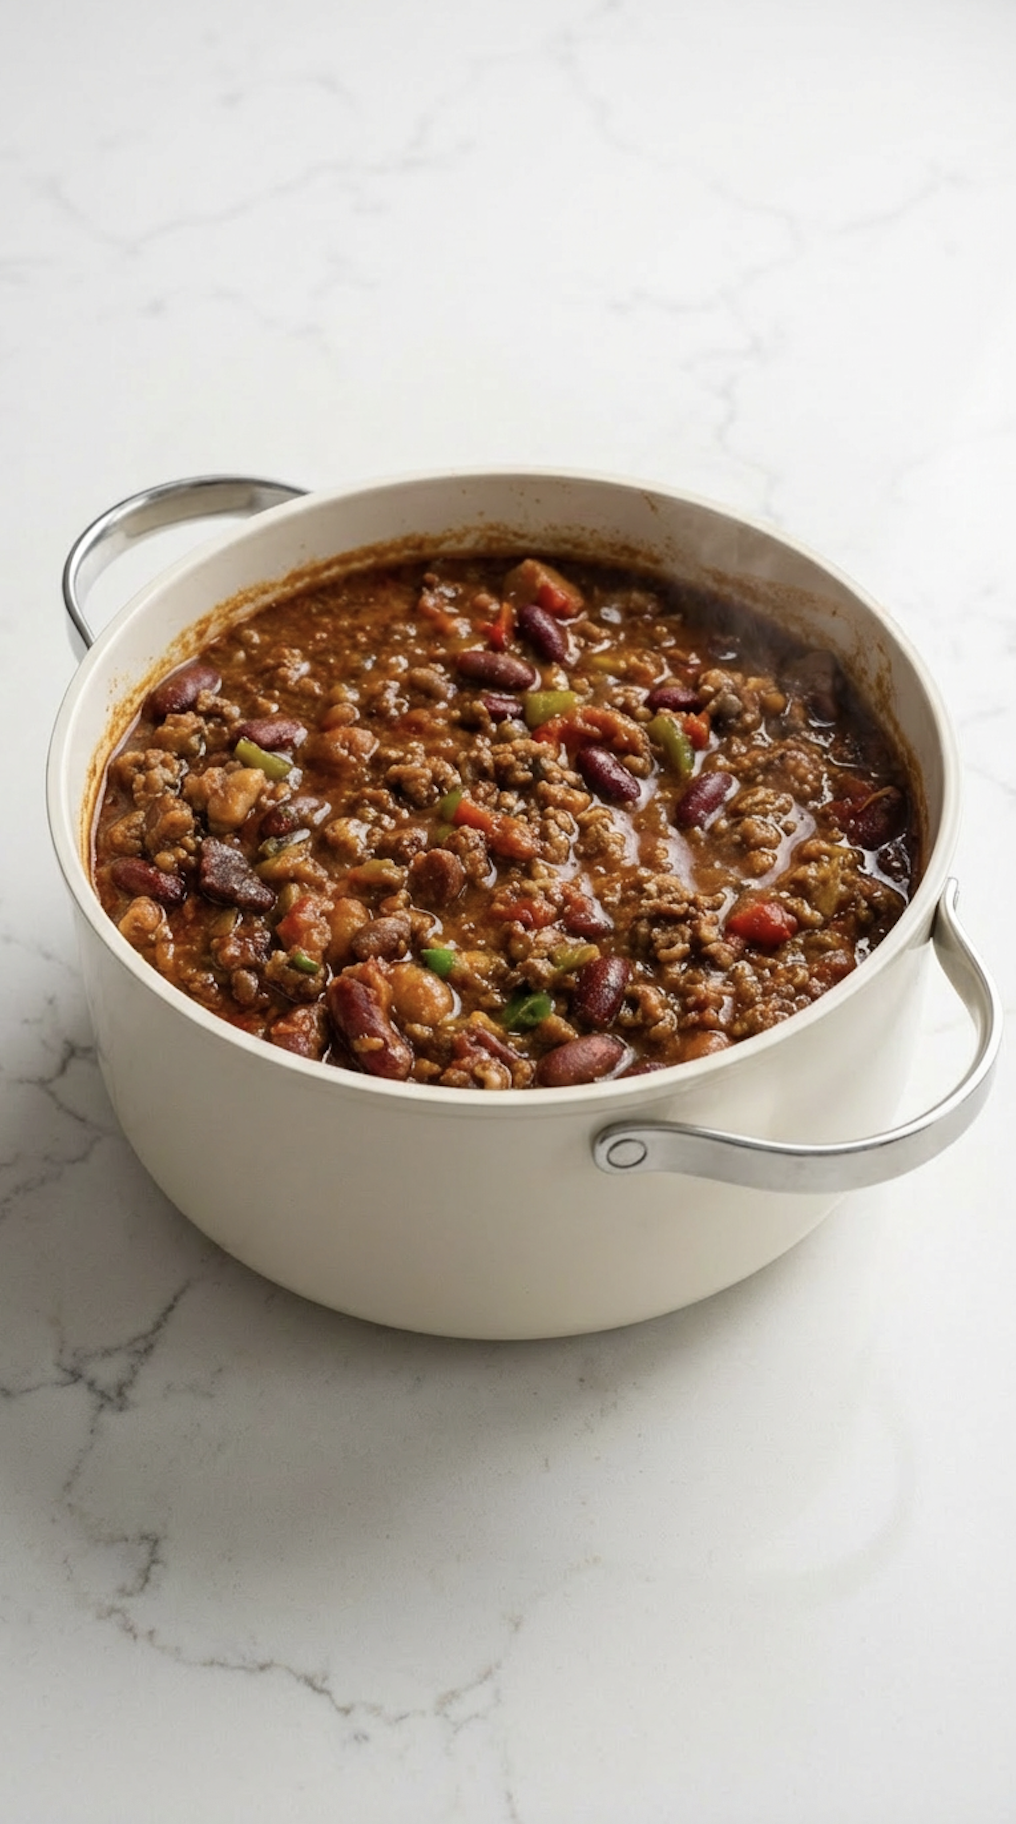
Step 5: Add the Beans
Stir in the kidney beans and pinto beans. Bring the chili to a gentle simmer.
Step 6: Simmer and Relax
Lower the heat and let the chili simmer uncovered for about 45 minutes to an hour, stirring occasionally. The longer it simmers, the thicker and more flavorful it becomes.
Taste and adjust seasoning as needed - a little more salt or chili powder can make all the difference.
Chili Is Better When It Simmers
One of my favorite things about making chili is that it doesn’t rush you.
Once everything is in the pot, you let it simmer. The flavors deepen, the sauce thickens, and it just gets better and better. You don’t need to babysit it - just stir occasionally and let time do its thing.
This is why chili is perfect for:
Lazy weekends
Meal prep
Feeding a crowd
Cozy weeknight dinners
It’s forgiving, flexible, and incredibly comforting.
Let’s Talk About the Beans (Briefly)
I know. Chili debates are serious business 😄
This version uses beans, because that’s how I grew up eating it - and because they add texture, heartiness, and make the chili extra filling. If you’re someone who prefers no beans, you can absolutely leave them out and bump up the meat instead.
There are no rules here. Just good food.
How Thick Should Chili Be?
This is totally personal preference.
I like mine thick enough to hold toppings, but still saucy enough that it doesn’t feel dry. If your chili gets thicker than you like, just add a splash of broth. If it’s thinner than you want, let it simmer a little longer uncovered.
Chili is forgiving like that.
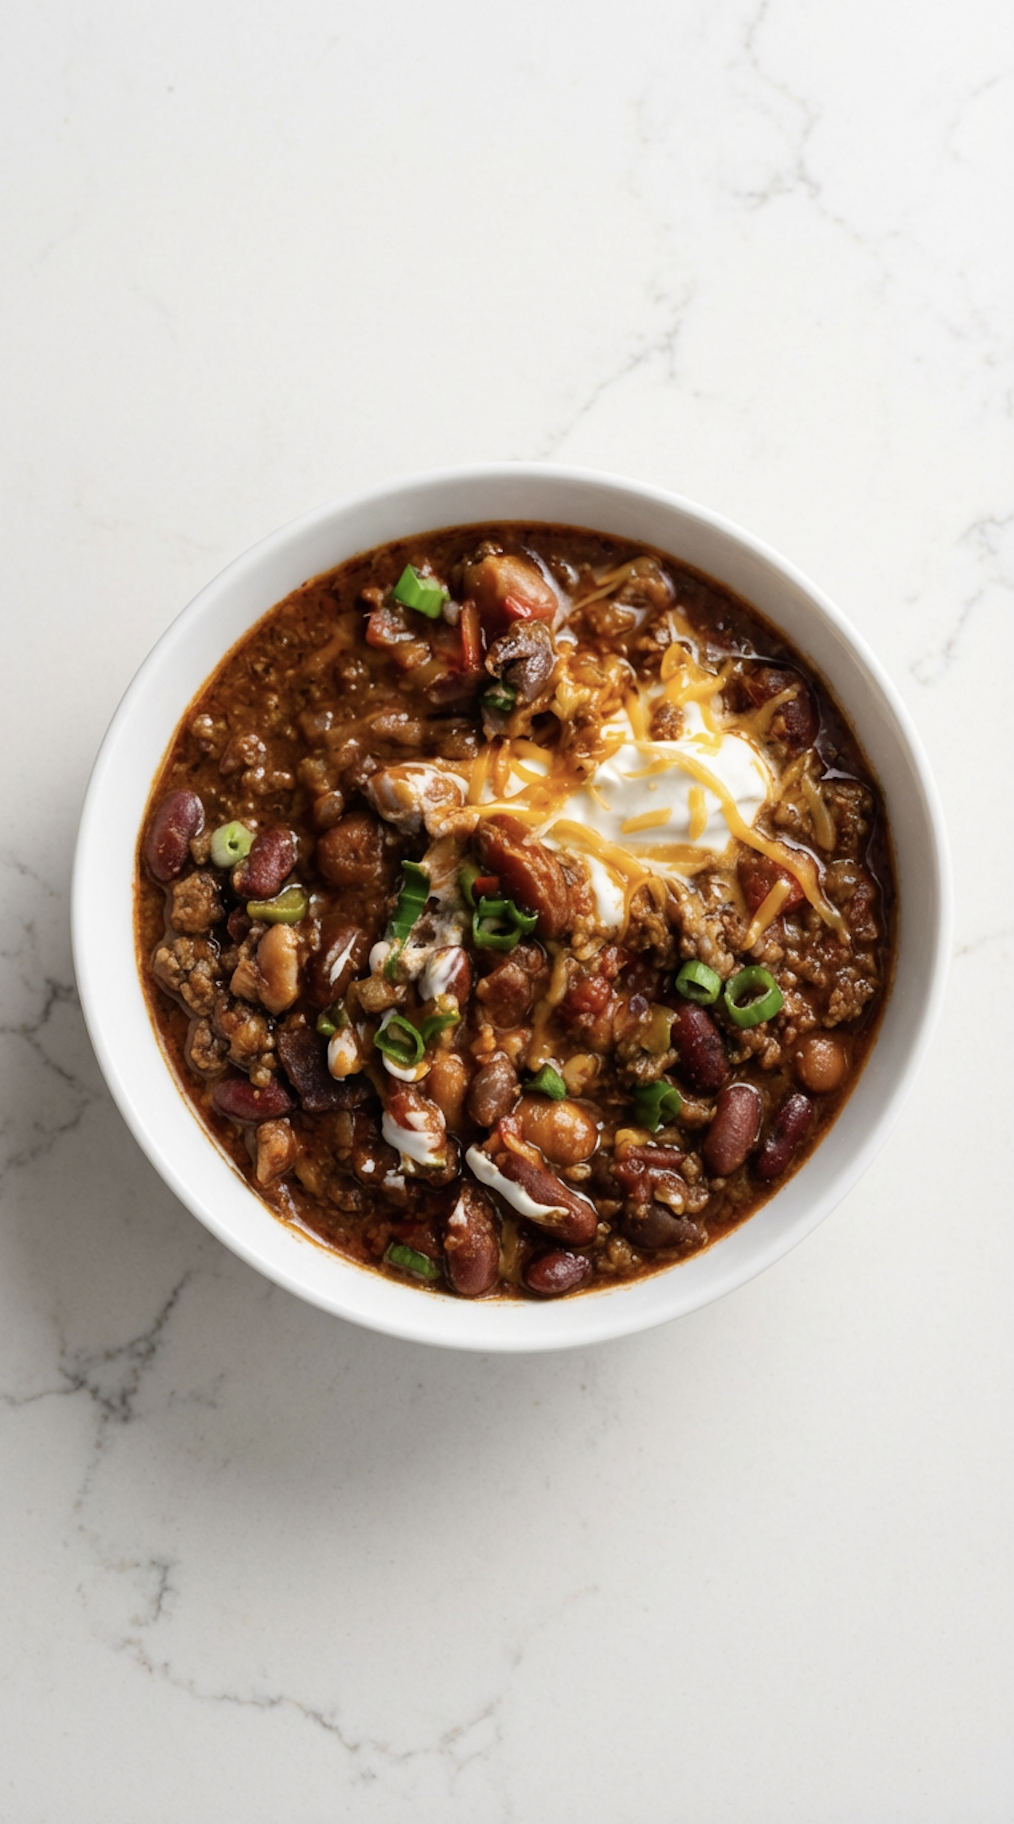
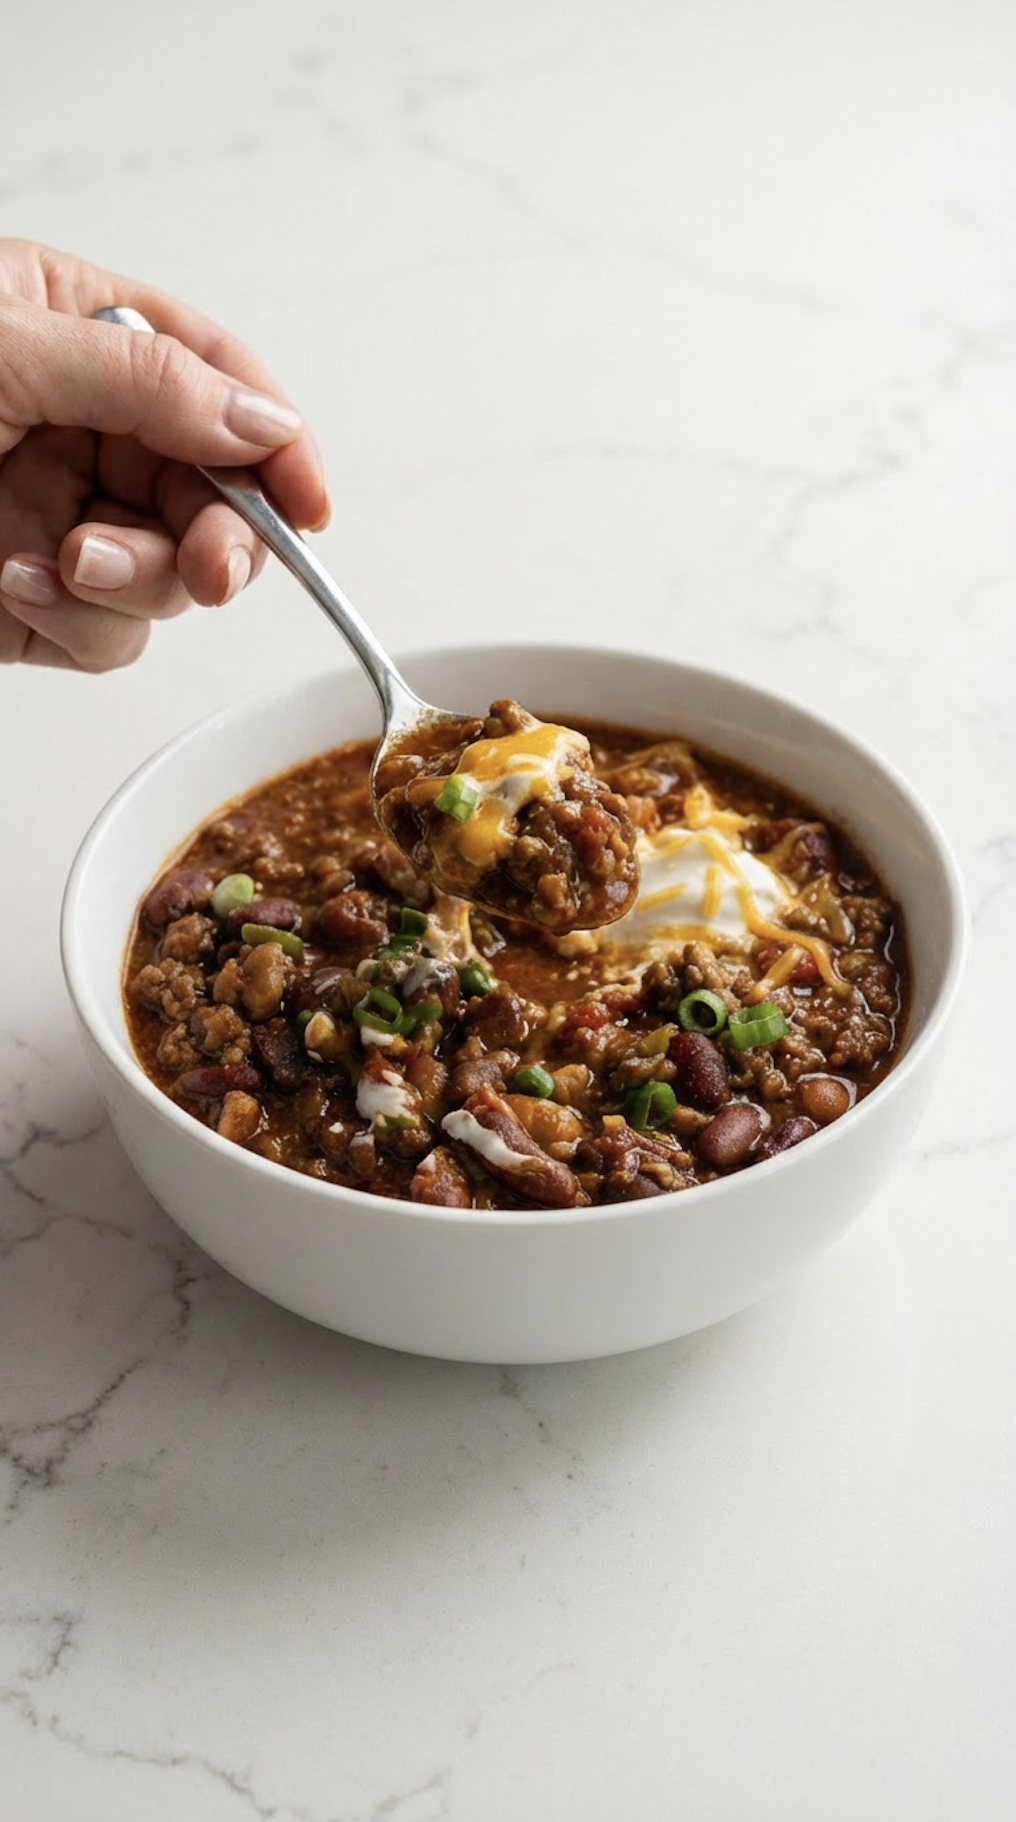
Chili Toppings (This Is Where the Fun Is)
Let’s be honest - toppings are half the joy.
Some of my favorites:
A dollop of sour cream
Chopped green onions
Fresh cilantro
Crushed tortilla chips or crackers
You can keep it simple or go all out. There’s no wrong way to top a bowl of chili.
Chili Gets Better the Next Day
If you’ve never had leftover chili, you’re missing out.
The flavors deepen overnight, and somehow it tastes even richer the next day. This makes it perfect for:
Meal prep
Freezing
Quick lunches
Just reheat gently on the stove or in the microwave, adding a splash of broth if needed.
Freezing & Storage Tips
Store leftovers in an airtight container in the fridge for up to 4 days
Freeze for up to 3 months
Thaw overnight in the fridge and reheat gently
This is one of those recipes that’s worth making a big batch of.
Make It Your Own
Once you’ve made this once, you’ll probably start tweaking it - and that’s a good thing.
You can:
Swap ground beef for ground turkey
Add a splash of coffee or cocoa powder for depth
Stir in a little hot sauce for heat
Add corn or extra beans
This chili adapts to you.
Final Thoughts
This traditional chili is one of those recipes that feels like home.
It’s warm, filling, and comforting in the most familiar way. It doesn’t need to be flashy or complicated - it just needs time, good ingredients, and a pot big enough to hold it all.
Whether you’re feeding your family, meal prepping for the week, or just craving something cozy, this chili shows up every single time.
And honestly? That’s why I keep making it!
Looking for more dinner recipes? Try my popular recipes below:

Classic Chili
This is the chili I make when I want something comforting, filling, and deeply familiar. The kind that simmers away on the stove, makes the whole house smell amazing, and somehow tastes even better the next day. It’s not fancy. It’s not trying to reinvent chili. It’s just really, really good traditional chili.
Ingredients
- 1 tablespoon olive oil
- 1 medium onion, diced
- 1 green bell pepper, diced
- 3 cloves garlic, minced
- 1½ pounds ground beef
- Salt and black pepper, to taste
- 2 tablespoons chili powder
- 1 teaspoon ground cumin
- 1 teaspoon paprika (smoked if you have it)
- ½ teaspoon oregano
- ¼–½ teaspoon cayenne (optional, to taste)
- 1 (28 oz) can crushed tomatoes
- 1 (15 oz) can diced tomatoes
- 1 cup beef broth
- 1 (15 oz) can kidney beans, drained and rinsed
- 1 (15 oz) can pinto beans, drained and rinsed
Instructions
Notes
- Swap ground beef for ground turkey
- Add a splash of coffee or cocoa powder for depth
- Stir in a little hot sauce for heat
- Add corn or extra beans
Nutrition Facts
Carbs
28 gCholesterol
60 mgFiber
9 gFat
20 gNet carbs
19 gSat. Fat
7 gSodium
650 mgSugar
7 gProtein
23 gCalories
374